
Kayak Rod Holder Options
The main thing that separates an ordinary kayak from a fishing kayak is a rod holder, or two, or five. In this installment, we'll discuss some of the many options available to you.
WHAT ARE YOUR NEEDS: For some of us, we feel the need to have several rods on board. This disease often stems from years of boating, where it was normally not a problem to carry numerous rods. Fear not - you can still satisfy that urge. But let's be honest, 2 or 3 is plenty (not for me, but it should be). So, as you start planning your rod holding community, make sure you allow for enough rods.
YOUR CHOICES: Deck mount rod holders ("Scotty", for instance) have either deck mount or flush mount bases. These have either a 4" round base or a 2" x 4" rectangular base. Go ahead and slice up a plastic milk carton and have some templates of these handy for later. Should you decide to go with flush mount rod holders that mount through the top deck (typically behind the cockpit) it will be helpful to have a template of that as well. This will be trickier to cut out, but will definitely help later on. If you aren't comfortable with the notion of drilling and cutting into your kayak, you can always go the way of the "milk crate", or even merely buy a seat with built in rod holders. There are numerous ways to accomplish the same goal and still remain in your mechanical comfort zone and within your budget.
LOCATION, LOCATION, LOCATION: This is very important. You may have a ballpark idea of where your rod holders should go, but it's wise to know for sure before you start poking holes in a perfectly good kayak. So, grab your gear, including 1 rod (preferably an old one, without the reel), those neato templates you made earlier, and a carpenter's pencil. Now, head out as IF you were going fishing. Obviously you won't have anywhere to place your rod, so secure it to the kayak via your paddle keeper. Once you've launched, grab that rod and secure your paddle. Now, goofy as it may sound, start going through the motions of fishing and changing rods. You'll start to see where you can easily reach while on the water. That's why it's not wise to install rod holders based on measurements and calculations made while in your driveway or garage. See, your balance is always good there, which makes more of the kayak seem easily accessible. Once you decide where you want each rod holder to go, mark that area with the pencil. Either use the template for exact location or simply make a mark where the rod will go - you can use that template later. Go ahead and fish a little while you're out there - I wouldn't go on the water without a fully functional rod either.

~Fishing Kayaks from Hoodoo Sports~
Looking for a high quality fishing kayak at a reasonable price? Check out Hoodoo's lineup featuring the new dual-drive Impulse.
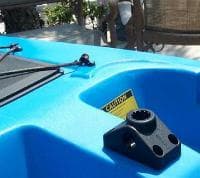
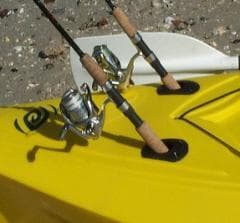
DECK MOUNT ROD HOLDER:
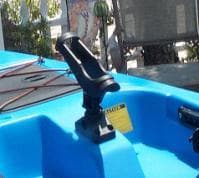
This is probably the easiest to install because, well, it simply mounts on the deck of your boat. Scotty rod holders are probably the most popular, but there are others that work just as well. They come in versions to fit either bait caster/spinning, or fly reels. They've very adjustable too. You can go with the deck mount bracket (which requires only 4 holes and 4 bolts) or the flush mount bracket (requires a hole to be drilled but installs with rivets). I'm partial to the flush mount bracket simply because it's leaves a nice flat surface when the rod holder is removed for transport. Here you see the flush mount Scotty with and without the rod holder.
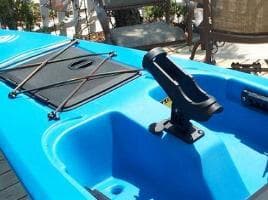
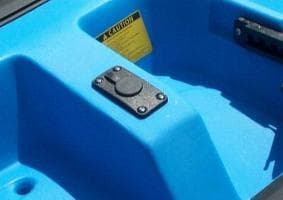
These rod holders make for a very clean look. This type of rod holder when mounted behind the cockpit also gets the reels a little farther away from the water.
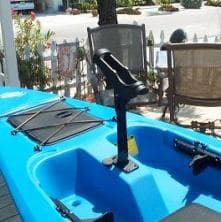
The deck mount version gives you a couple more inches of clearance off the deck, but as you can see, it will stick up during transport.
The best of both worlds here is to get the Scotty flush mount bracket and an extension - brilliant!
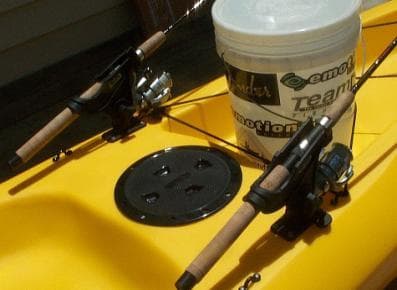
FLUSH MOUNT ROD HOLDER:
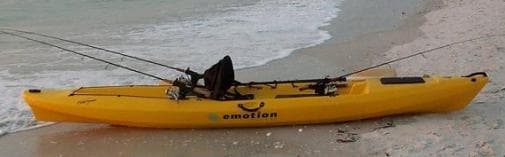
These are the least expensive rod holding solutions. But they're every bit as functional. Most "angler" models have a pair of these installed behind the cockpit. But as you can see they can be used other places as well. Don't limit yourself !
NOTE: We'll talk about this nifty PVC work bench later too ...
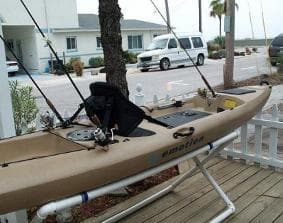
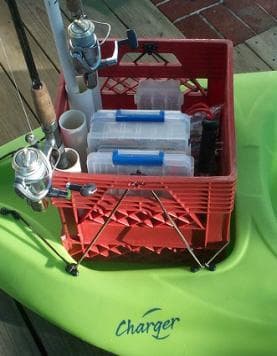
ROD HOLDERS WITHOUT REGRET - THE MILK CRATE:
When I first got in to this sport, I decided I'd never be one of those people that used a milk crate for storage or adding PVC rod holders. Never say "never". Grab a milk crate, 10' of PVC, a little cutting, some fasteners, and my friend, you're fishing ! This also a slick way to haul all that tackle you feel you must have. Since these pictures were taken, I've added store bought rod holders and some other gadgets to my milk crate, but the idea is still the same. It's simple, it's effective, and it's cheap - I rarely leave home without it.
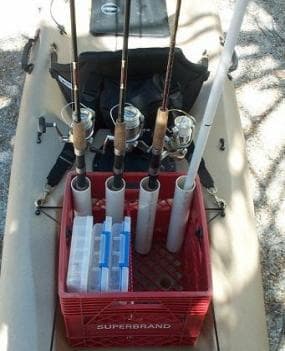
And by the way, you don't have to sneak around the back of a convenience store and "liberate" milk crates anymore. You can buy them brand spanking new from numerous places on line, in every color of the rainbow.
INSTALLATION: You can go shopping now, informed and confident. We'll go over how to install these in detail in the next issue. But, if you're ready to measure, cut, drill, and rivet now, go for it. Most internet kayak fishing forums have a "rigging" or "do it yourself" section, packed full of pictures, directions, and ideas. There is some brilliance out there - take advantage of it. But be forewarned, once you start customizing your vessel you never stop …
See you out on the water ...
Related Articles
Learn how to make a pivoting rod holder that will keep your rods out of the way when you don't need them…

Watch and hear the story of how Raf Vargas caught a 170lb dogfish tuna. After hooking it at a depth of…

Paddling.net has always given me plenty of room to not only discuss paddle fishing things, but other…
Wisdom can sometimes be found in some of the strangest places. Recently we made a trip to Key West for a…